1.
This is a new feature added to the office 365,
this is available in your office 365 account.

2.
On selecting the link will take you to the Forms
home screen ,there are two options “New
Forms” and “New Quiz”.

Lets just start on the New Forms
a.
First you need to create a category/ title for the form, I am creating a “Tell us about
yourself form” (I know I am very innovative 😉 )

You have an option to add a thumbnail image for your form.
b.
Now let us design a basic input form by clicking
on the Add Question button.
c.
My form is going to Contain “Name”, “DOB”,
“Gender”, “Do you Like Windows Forms” and “You availability”
Name - Text

I have made this field Required and not a long answer. On the top right
of the field we have the options to copy, delete, move the sequence up or down
etc.
Gender - Choice

Once I typed Gender system automatically prompted me with the
suggestions, it understands few other things like “which day”, which month”
etc. I have selected “Add all” and it
added all the options. Choice field do have an option of multiple answers,
since it is not suitable for the context I am leaving it, once selected radio
buttons will give way for check boxes.
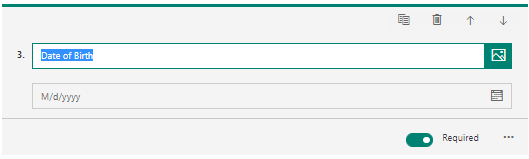
DOB – Date
Availability – Likert

If we want to add additional feeling(options) we have a plus button. If
your content is different you can add additional statements
How do you like windows forms -
Rating

We have multiple option to show rating as numbers or the stars, anyway I
prefer the stars so I go with the stars.We have the option to select the rating
out of 10 or 5.
Once you are done with the form we have the option to set who can respond
and whether they can respond . The option is available from the “setting” on
the menu on the right corner.

In the settings menu you have the option to Who can fillout the form and
the timer period for accepting the results.

So I am done with my form, so now
we are good for sharing the form before that we can see the preview the of the
form, how it looks.

Not Bad though 😉 . Now we are good to share it with others to
get the feedback. We have multiple options to share the form with audience like
QR code, send the link, send in email and iframe to embed in your page. Once
the users starts giving responses you can see it from the Responses tab. The
response screen is auto updated with the responses, we have the provision to
export it to excel.Here is a sample response.
